

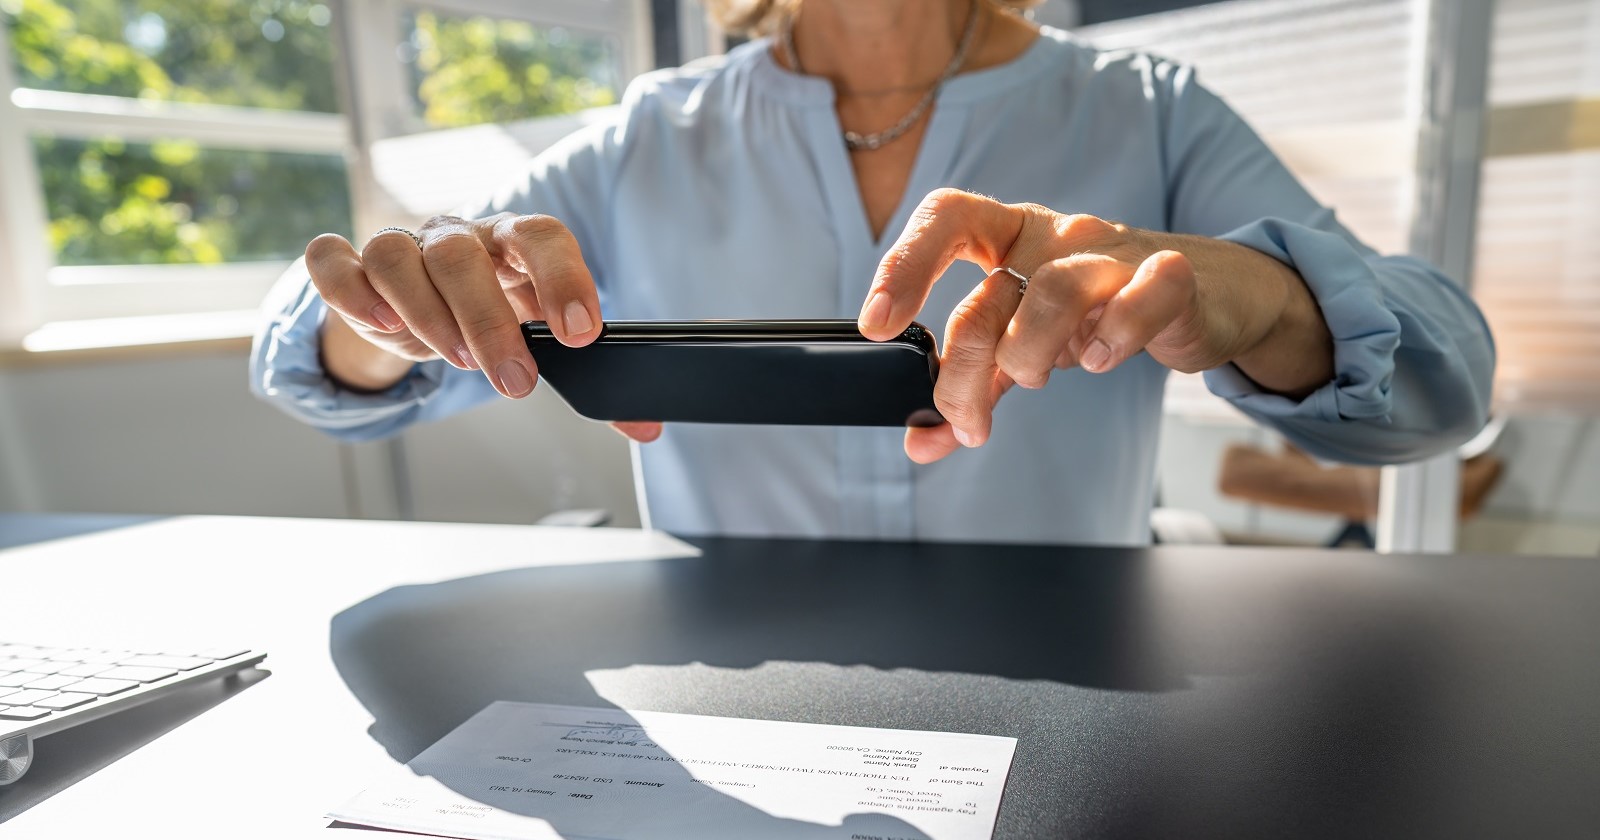
Chase Bank’s mobile app is a great way to do your banking on the go. You can check your balance, send money to friends, and even deposit your checks!
Many mobile apps have their own version of mobile deposit. Chase calls it QuickDeposits — for a good reason! Deposits made on the Chase Mobile App usually only take a business day or two to post in your account.
Step-by-Step Guide on How to Deposit Checks on the Mobile Chase App
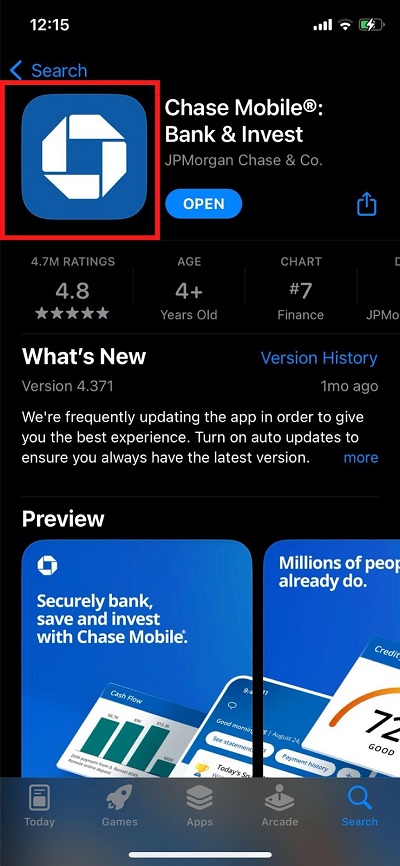
Before Starting, Make Sure You Download the Chase Mobile App
If you don’t already have the app, head to Apple’s App Store or the Google Play Store App. Type in “Chase” or “Chase Bank App” and it should be the first app to pop-up. You can tell it’s the legitimate Chase Bank mobile app by the iconic blue octagon.
Step 1: Open Mobile App & Sign In
If you’ve used the app before, you’ll login with the same username and password you use every time. If you’re new to the Chase Bank mobile app, you can click “sign up” towards the bottom left hand portion of the screen.
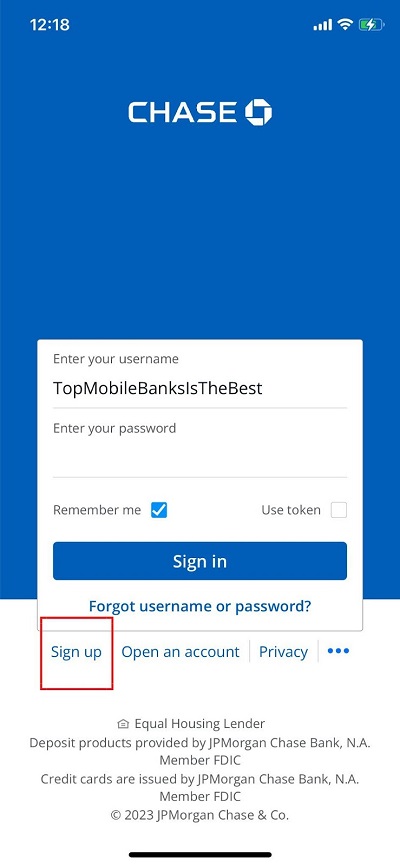
Note: you can only sign up for the mobile app if you already have accounts with Chase. To create your online banking login information, you’ll need your account and routing numbers as well.
To create a username, Chase requires 8-32 characters, with at least one letter and one number, and does not allow special characters.
Creating a password is a little trickier. Chase is pretty strict about their rules when you’re trying to create a password. You can’t have anything related to your personal information, so no birthdays, social security numbers, or addresses.
Step 2: Choose the Account You Want to Deposit into and Swipe Left
Chase makes it easy to deposit checks into your accounts. You can deposit checks into both your checkings and savings accounts directly from the app, saving you from having to make a transfer.
Select the account you want the check to go into and swipe left.
Step 3: Click the Three Dots
Once you’ve chosen the account you want to deposit into and swipe left, you’ll see three options: pay, transfer, and three dots. Clicking on the three dots will provide you with more options.
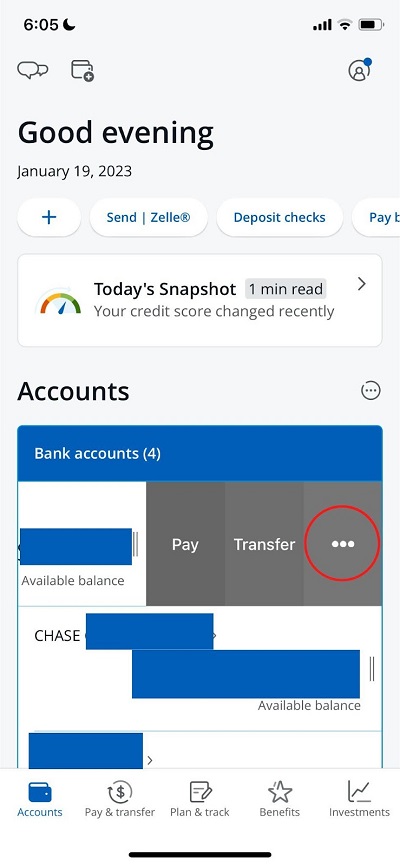
Step 4: ‘Click Deposit Checks’
This one’s pretty obvious. Click deposit checks to move onto the next step in depositing checks on the Chase App
Step 5: Enter in Your Deposit Amount
While the amount of the check will be included in the picture you take later, Chase asks you to manually input the dollar amount of the check. This is to ensure they’ve read the right dollar amount on the check.
It will also ensure you get the right amount into your account. If you put in that your check is for $500 and the app somehow reads $50, you’ll know before the deposit has been made.
Step 6: Make Sure the Front of the Check is Correct
Before taking a picture of your check and depositing it, make sure everything is correct. Double check that the check is made out to you and that your name is spelled correctly.
You’ll also want to make sure the written amount matches the numerical amount, as Chase and all banks alike negotiate the written amount first.
You’ll also want to make sure the date is within the past six months and that the writer of the check signed the bottom right hand portion.
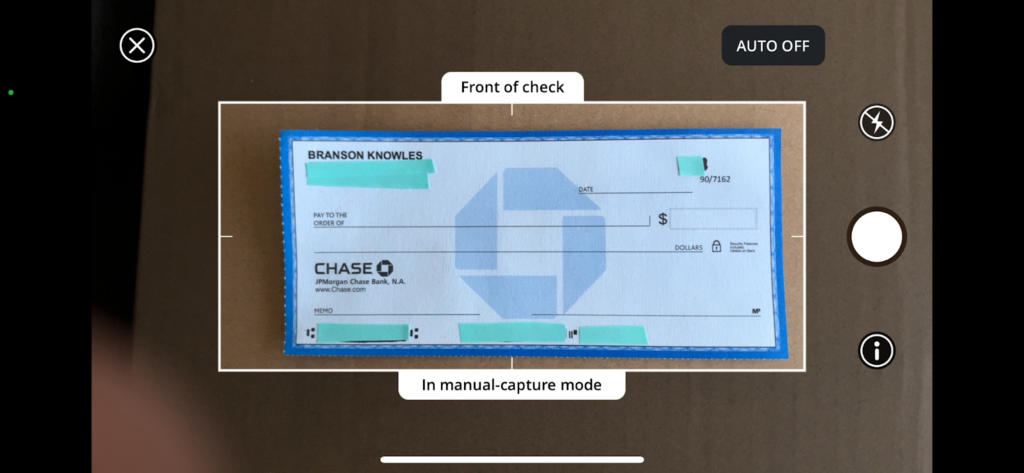
Step 7: Take a Picture of the Front of the Check
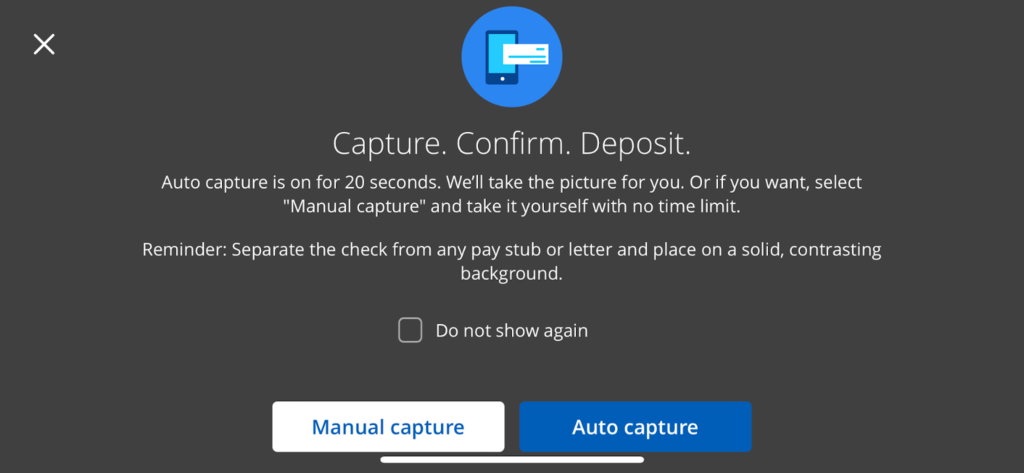
Before you capture the front of your check, the Chase mobile app will ask you two questions. The first is for permission to use your mobile device’s camera. If you want to deposit checks on the Chase App, you’ll have to click yes.
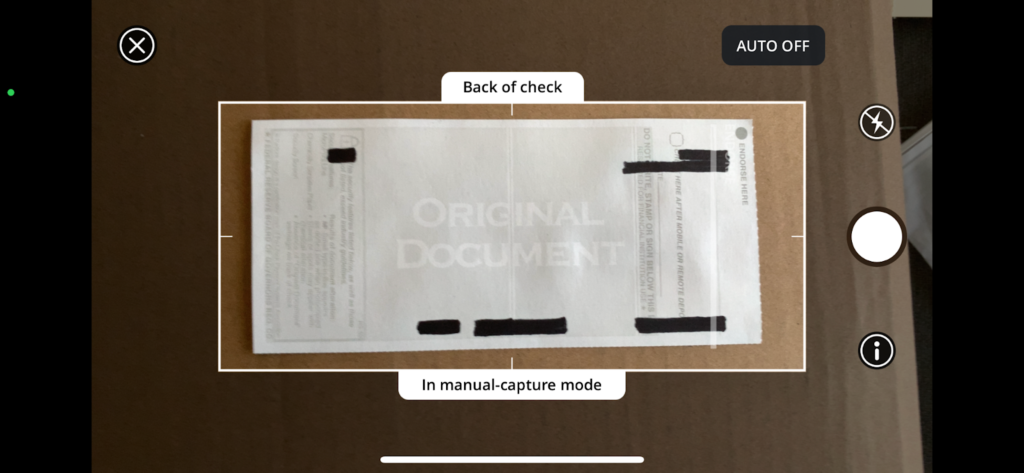
Next it will ask if you want to use manual or auto capture mode. Manual capture mode will let you take the picture when you want, while auto capture mode will take the picture as soon as you line up the check within the outline the app gives you.
Step 8: Make Sure the Back of the Check is Properly Endorsed
Before taking a picture of the back of the check, make sure you endorse it correctly. If the check was made payable to a nickname, say “Nate” instead of “Nathan”, you’ll first want to sign in your nickname before signing your legal name under it.
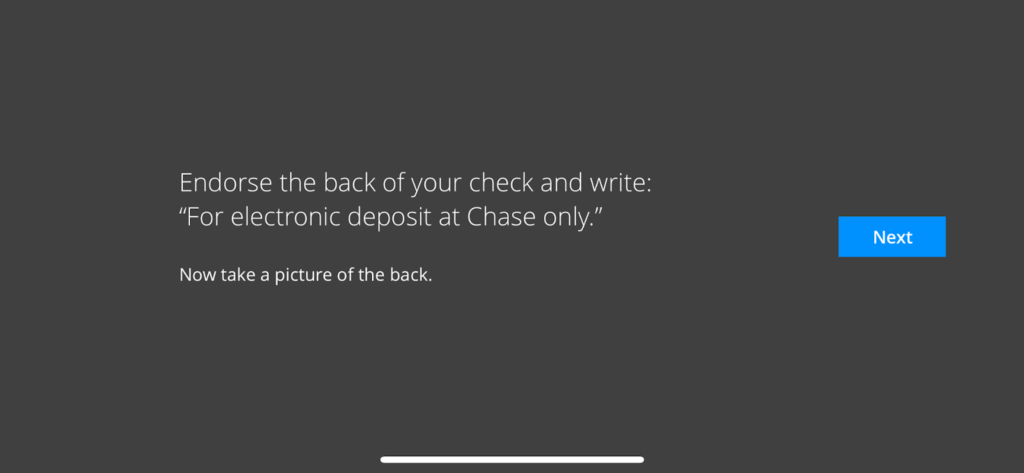
After you sign it, write “for electronic deposit at Chase only” underneath your signature. Some checks might already have “for electronic deposit at Chase only” with a box for you to check it.
Don’t worry about forgetting this part, as Chase will remind you with a handy screen I’ll be sure to include:
Step 9: Take a Picture of the Back of the Check
Once the back of the check is properly endorsed, go ahead and take a picture of it.
Step 10: Confirm Your Deposit
If there are any problems with the images you’ve taken, Chase will show you a screen asking you to retake them.
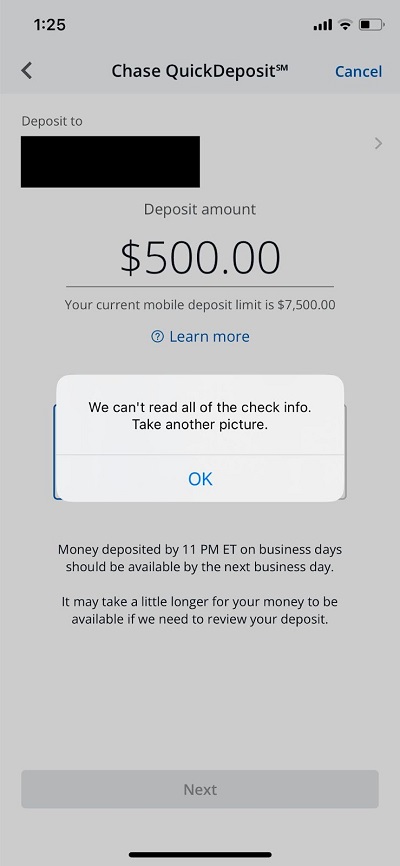
If there aren’t any problems though, confirm the dollar amount you manually entered matches the dollar amount of the check and that your funds are headed to the right account.
After you’ve verified your deposit, hit confirm. If you’ve done everything correctly, you should see the funds in your account in 1-2 business days.
Common Chase Mobile Deposit Problems (and How to Fix Them)
Deposit rejected for image quality.
Blurry photos, poor lighting, or a check that isn’t fully inside the frame are the most common causes. Retake the photo in good lighting against a dark, plain background, with all four corners visible.
Missing or incorrect endorsement.
If the back of the check isn’t signed and endorsed correctly, the app may reject the deposit or flag it for review. Double-check your endorsement matches what the app instructs before resubmitting.
How to Properly Endorse a Check
The amount doesn’t match the check image.
If the dollar amount you type in doesn’t match what the app reads from the check, expect a delay, an adjustment, or a rejection. Re-enter the amount carefully and compare it against both the written and numerical amounts on the check.
“Duplicate deposit” warning.
If the app flags a deposit as a possible duplicate, don’t resubmit it. Check your deposit history first to see whether the original attempt actually went through, and contact Chase if you’re unsure — resubmitting can create a real duplicate.
Deposit is over your limit.
If a check exceeds your current mobile deposit limit, the app will typically reject it or ask you to deposit a smaller amount. Large checks may need to go through an ATM or branch instead.
To check your specific mobile deposit limits:
- Sign in to the Chase Mobile App
- Select ‘Deposit checks’
- Choose your account
- Tap ‘Learn More’
Unexpected hold or delayed availability.
Larger checks, new accounts, or checks that trigger a fraud review can be held longer than the standard next-business-day timeline. The app should show a hold notice with a reason and an expected release date — check there before contacting support.
App or connection issues.
Deposit failures caused by a dropped connection or app bug usually resolve by confirming your pending deposits (to avoid an accidental duplicate), then updating the app or switching to a stable connection before retrying.
If a problem doesn’t resolve on its own, contact Chase directly rather than repeatedly resubmitting the same check — and keep the physical check until you can confirm the deposit posted successfully.
How Long Does Chase Mobile Check Deposit Take?
Many people think depositing a check through the app takes longer than depositing it in person. That’s generally not true — with one exception: accounts open 30 days or fewer. Federal rules allow banks to hold funds longer on brand-new accounts, regardless of deposit method (Board of Governors of the Federal Reserve System).
If your account is older than that, federal rules require Chase to make at least $275 of your check available by the next business day — this is the standard Regulation CC threshold that applies to check deposits generally, not something unique to mobile deposit. If your check is less than $275, you may see all of it available right away (Consumer Financial Protection Bureau).
How to Endorse a Check for Chase Correctly
If you want to make sure you endorse your check correctly for Chase Mobile deposit, sign the back of the check like you normally would and write “for electronic deposit at Chase only” underneath.
Can I Deposit Third-Party Checks through Chase Mobile Deposit?
Third-party checks are checks made payable to one person that a separate person deposits. For example, If topmobilebanks.com made a check payable to my Chief Editor Adrian Volenik and Adrian wanted to give me the check, he’d sign the back of it and I’d sign underneath it, making it my check.
Chase, unfortunately, does not accept third-party checks through mobile deposit. I’d have to head into a branch in person if I wanted it in my account.
Security
As always, keep your online login information secure and don’t share it with anyone. If your account is used fraudulently after you’ve shared your login, your legal protections get more complicated — federal rules (Regulation E) base your liability on how quickly you report the unauthorized activity, not on a flat rule that voluntarily shared credentials void all protection.
Still, sharing your login is the single easiest way to weaken your own position if something goes wrong, so treat it the same as you’d treat your debit card PIN.
Can I Deposit Third-Party Checks through Chase Mobile Deposit?
Third-party checks are checks made payable to one person that a separate person deposits. For example, If topmobilebanks.com made a check payable to my Chief Editor Adrian Volenik and Adrian wanted to give me the check, he’d sign the back of it and I’d sign underneath it, making it my check.
Chase, unfortunately, does not accept third-party checks through mobile deposit. I’d have to head into a branch in person if I wanted it in my account.
More Useful Articles About Banking with Chase
- Chase Bank Name and Address (How to receive Direct Deposits)
- 7 Ways to Deposit Money into Your Chase Account (Guide)
- What Happens if Your Chase Account is Negative For Too Long
- 4 Ways to Talk to a Real Person at Chase (Phone/In Person)
- 6 Ways to Check Chase Card Balance (With and W/O The App)
- How to Change Name on Chase Bank Account (All Cases)